BY KATE PUHALA
Let us introduce you to your new favorite beauty tool: nail striping tape. This ultra thin adhesive is basically to thank for the Bieber-esque explosion of nail art—it lets just about anyone achieve salon-quality precision with their at-home manicures. Case in point: striped nail art. Free handing such a defined design is near impossible, but with this tape handy, we’re seeing clean, minimal looks on just about every tricked out tip around. Get your squiggle-free inspo here with these 14 striped nail art tutorials you have to try now.

1. Linear Equation Manicure: You’ll quickly learn that color contrast is key when it comes to acing the striped mani. We’re nuts about this teal and black number—we’d totally rock it during work hours. (via Brit + Co.)

2. DIY Single Stripe Nails: Here’s a look where less is so much more. This solo stripe blurs the line between sporty and super chic, and we totally approve. (via Isla Everywhere)

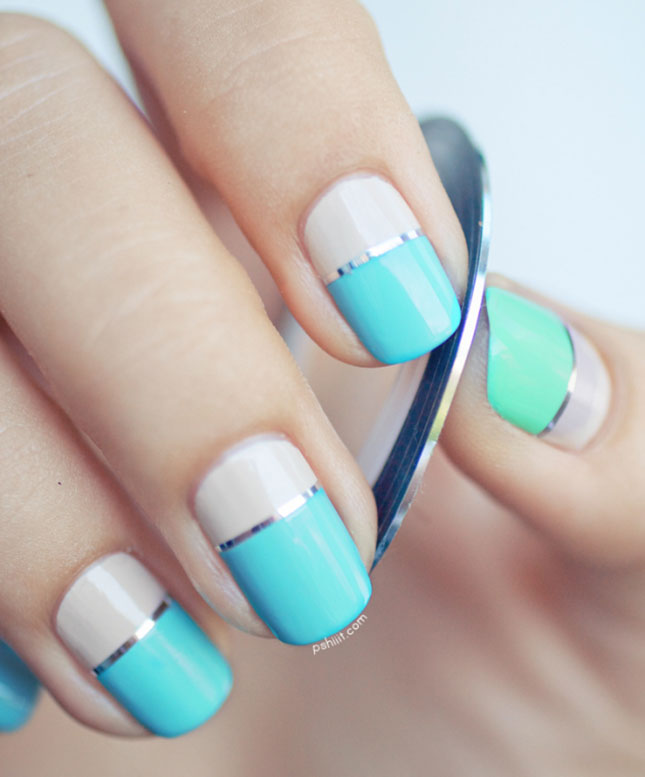
3. Color Block Striped Nails: This time, the nail striping tape stays on! The silver strip acts as an eye-catching divide between the nude and pastel color blocks in a move that’s clever and way cool. (via Pshiiit)

4. Minimalism Mani: We’re completely blown away by this high-design nail art. File this look under advanced techniques and rate the patience level high—while we can imagine a few other things we’d rather do than lay down this gradient template, it’s obvious that the commitment pays off. (via Pshiiit)

5. Negative Space Nautical Nails: So this is what happens when you use a clear base coat for a super striped mani… and it rules! The technique is very paint by numbers-inspired—we like how this blogger kept all the thin stripes orange to unify the design. (via So Nailicious)

6. Golden Ratio Manicure: This is the perfect special occasion mani: simple to do (thanks striping tape!), yet so stunning. The contrast between the glittery gold base coat and black topcoat is especially striking. (via Brit + Co.)

7. Washi Nail Striping: Don’t have nail striping tape on hand? Just use washi tape(seriously, this mani speaks to us). Even though the stripes aren’t perfectly straight, the polish palette keeps this look chic. (via Pshiiit)

8. Nail Tape Stripes: We’re straight up obsessed with this nail art that combines our two favorite design elements: clean lines and a pop of color. We’ve never spoken truer words when we say this girl nailed it. (via Snobka)

9. Glitter Stripes: Glitter craft glue as nail art? As fellow DIYers, we have to say we totally get how that can happen. Sure it’s unconventional, but does it matter when your nails end up looking this luxe? (via …love Maegan)

10. Grid Nail Art: Move over polka dots! The geo craze continues with this slick grid nail art. It’s a killer way to rock black and white tips. (via So Nailicious)

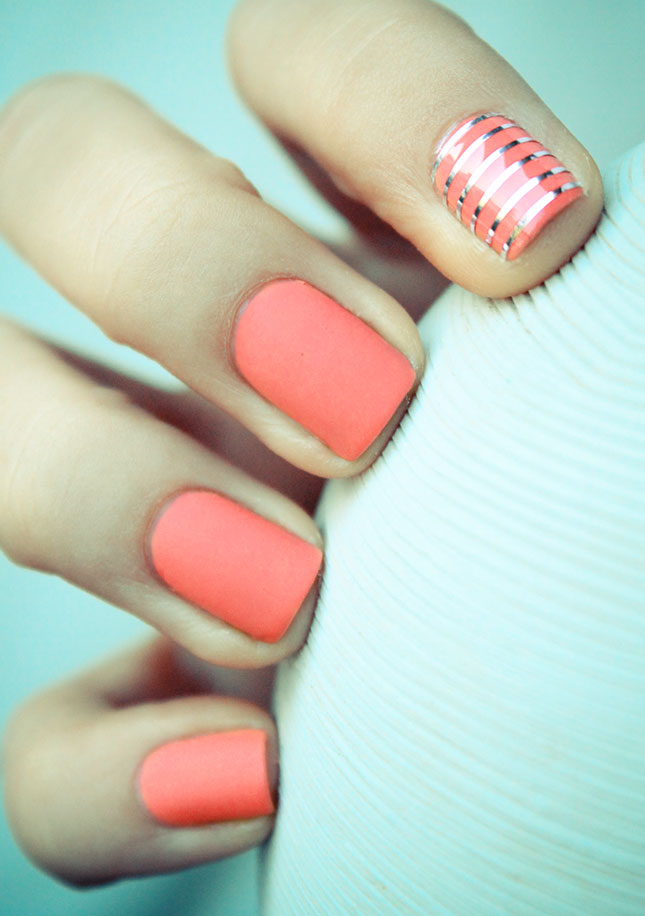
11. Stripe Contrast Nail: Who knew six strips of silver striping tape could cause serious nail envy? It might be the easiest way to amp up your mani. (via Pshiiit)

12. Color Inspiration: Okay, so you’re never ever going to shovel out for nail striping tape. No biggie—this is the striped nail tutorial for you. These snug brush strokes still look like a dream under a glittery top coat. (via Miss Renaissance)

13. Licorice Nails: Hypnotized by these black and white striped nails (and did you spot the mini heart)? Yeah, us too. If this looks like a style you can see yourself rocking ‘round the clock, we suggest you invest in a striped stamping plate to speed up the process. (via Pshiiit)

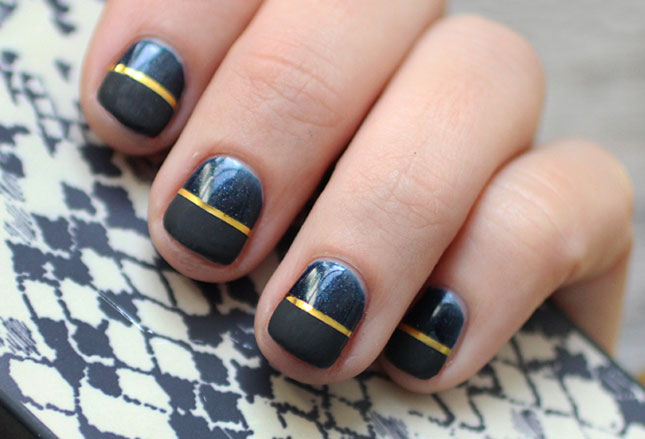
14. Half Matte Nails: Even though the combo of shimmery navy and matte-as-all-heck black polish make one ultra hip mani, the gold striping tape definitely steals the show. It’s a must-try look that’s fit for winter, so what are you waiting for? (via I Spy DIY)


